Know how directly from the Microsoft 365 mail merge experts
Wie man einen Serienbrief aus Excel erstellt - der einfachere Weg (Schritt-für-Schritt-Anleitung)
Lass uns gleich zur Sache kommen. Du hast wahrscheinlich schon von einem Serienbrief mit Outlook, Word und Excel gehört und es vielleicht auch versucht, aber die Chancen stehen gut, dass du frustriert warst über etwas, das eigentlich eine ziemlich einfache Aufgabe sein sollte. Du möchtest einfach eine Menge E-Mails an eine Liste von Leuten senden und den Inhalt oder die Anhänge personalisieren.
In diesem Leitfaden zeige ich dir ein kostenloses Plugin, das du im von Microsoft genehmigten Store herunterladen kannst, das diese Aufgabe wirklich einfach macht.
Schritt 1. Erstelle eine Excel-Tabelle
Wenn du das noch nicht gemacht hast oder eine von einer anderen Software exportiert hast, musst du ein neues Excel-Blatt erstellen.
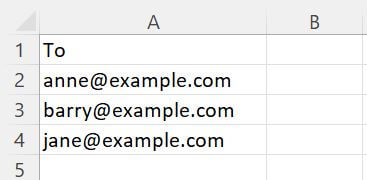
Beginne damit, “To” in die erste Zelle zu schreiben und eine Liste von E-Mail-Adressen in die darunterliegenden Zellen hinzuzufügen. Wenn du nur individuelle E-Mails an diese Personen senden möchtest, bist du fertig - gehe zu Schritt 2.
Wenn du deine E-Mail etwas persönlicher gestalten möchtest, könntest du Spalten wie folgende hinzufügen:
- Vorname (es wird später einfacher sein, Spaltennamen ohne Leerzeichen zu verwenden)
- Nachname
- Firma
- Anrede (z.B. Herr, Frau, Fräulein)
- LetzteSpendenhöhe
Pro Tipp
Mit diesem Ansatz kannst du auch verschiedene Anhänge an jede Person in deiner Tabelle senden. Lies mehr über Serienbrief mit Anhängen:
Schritt 2. Installiere das Plugin
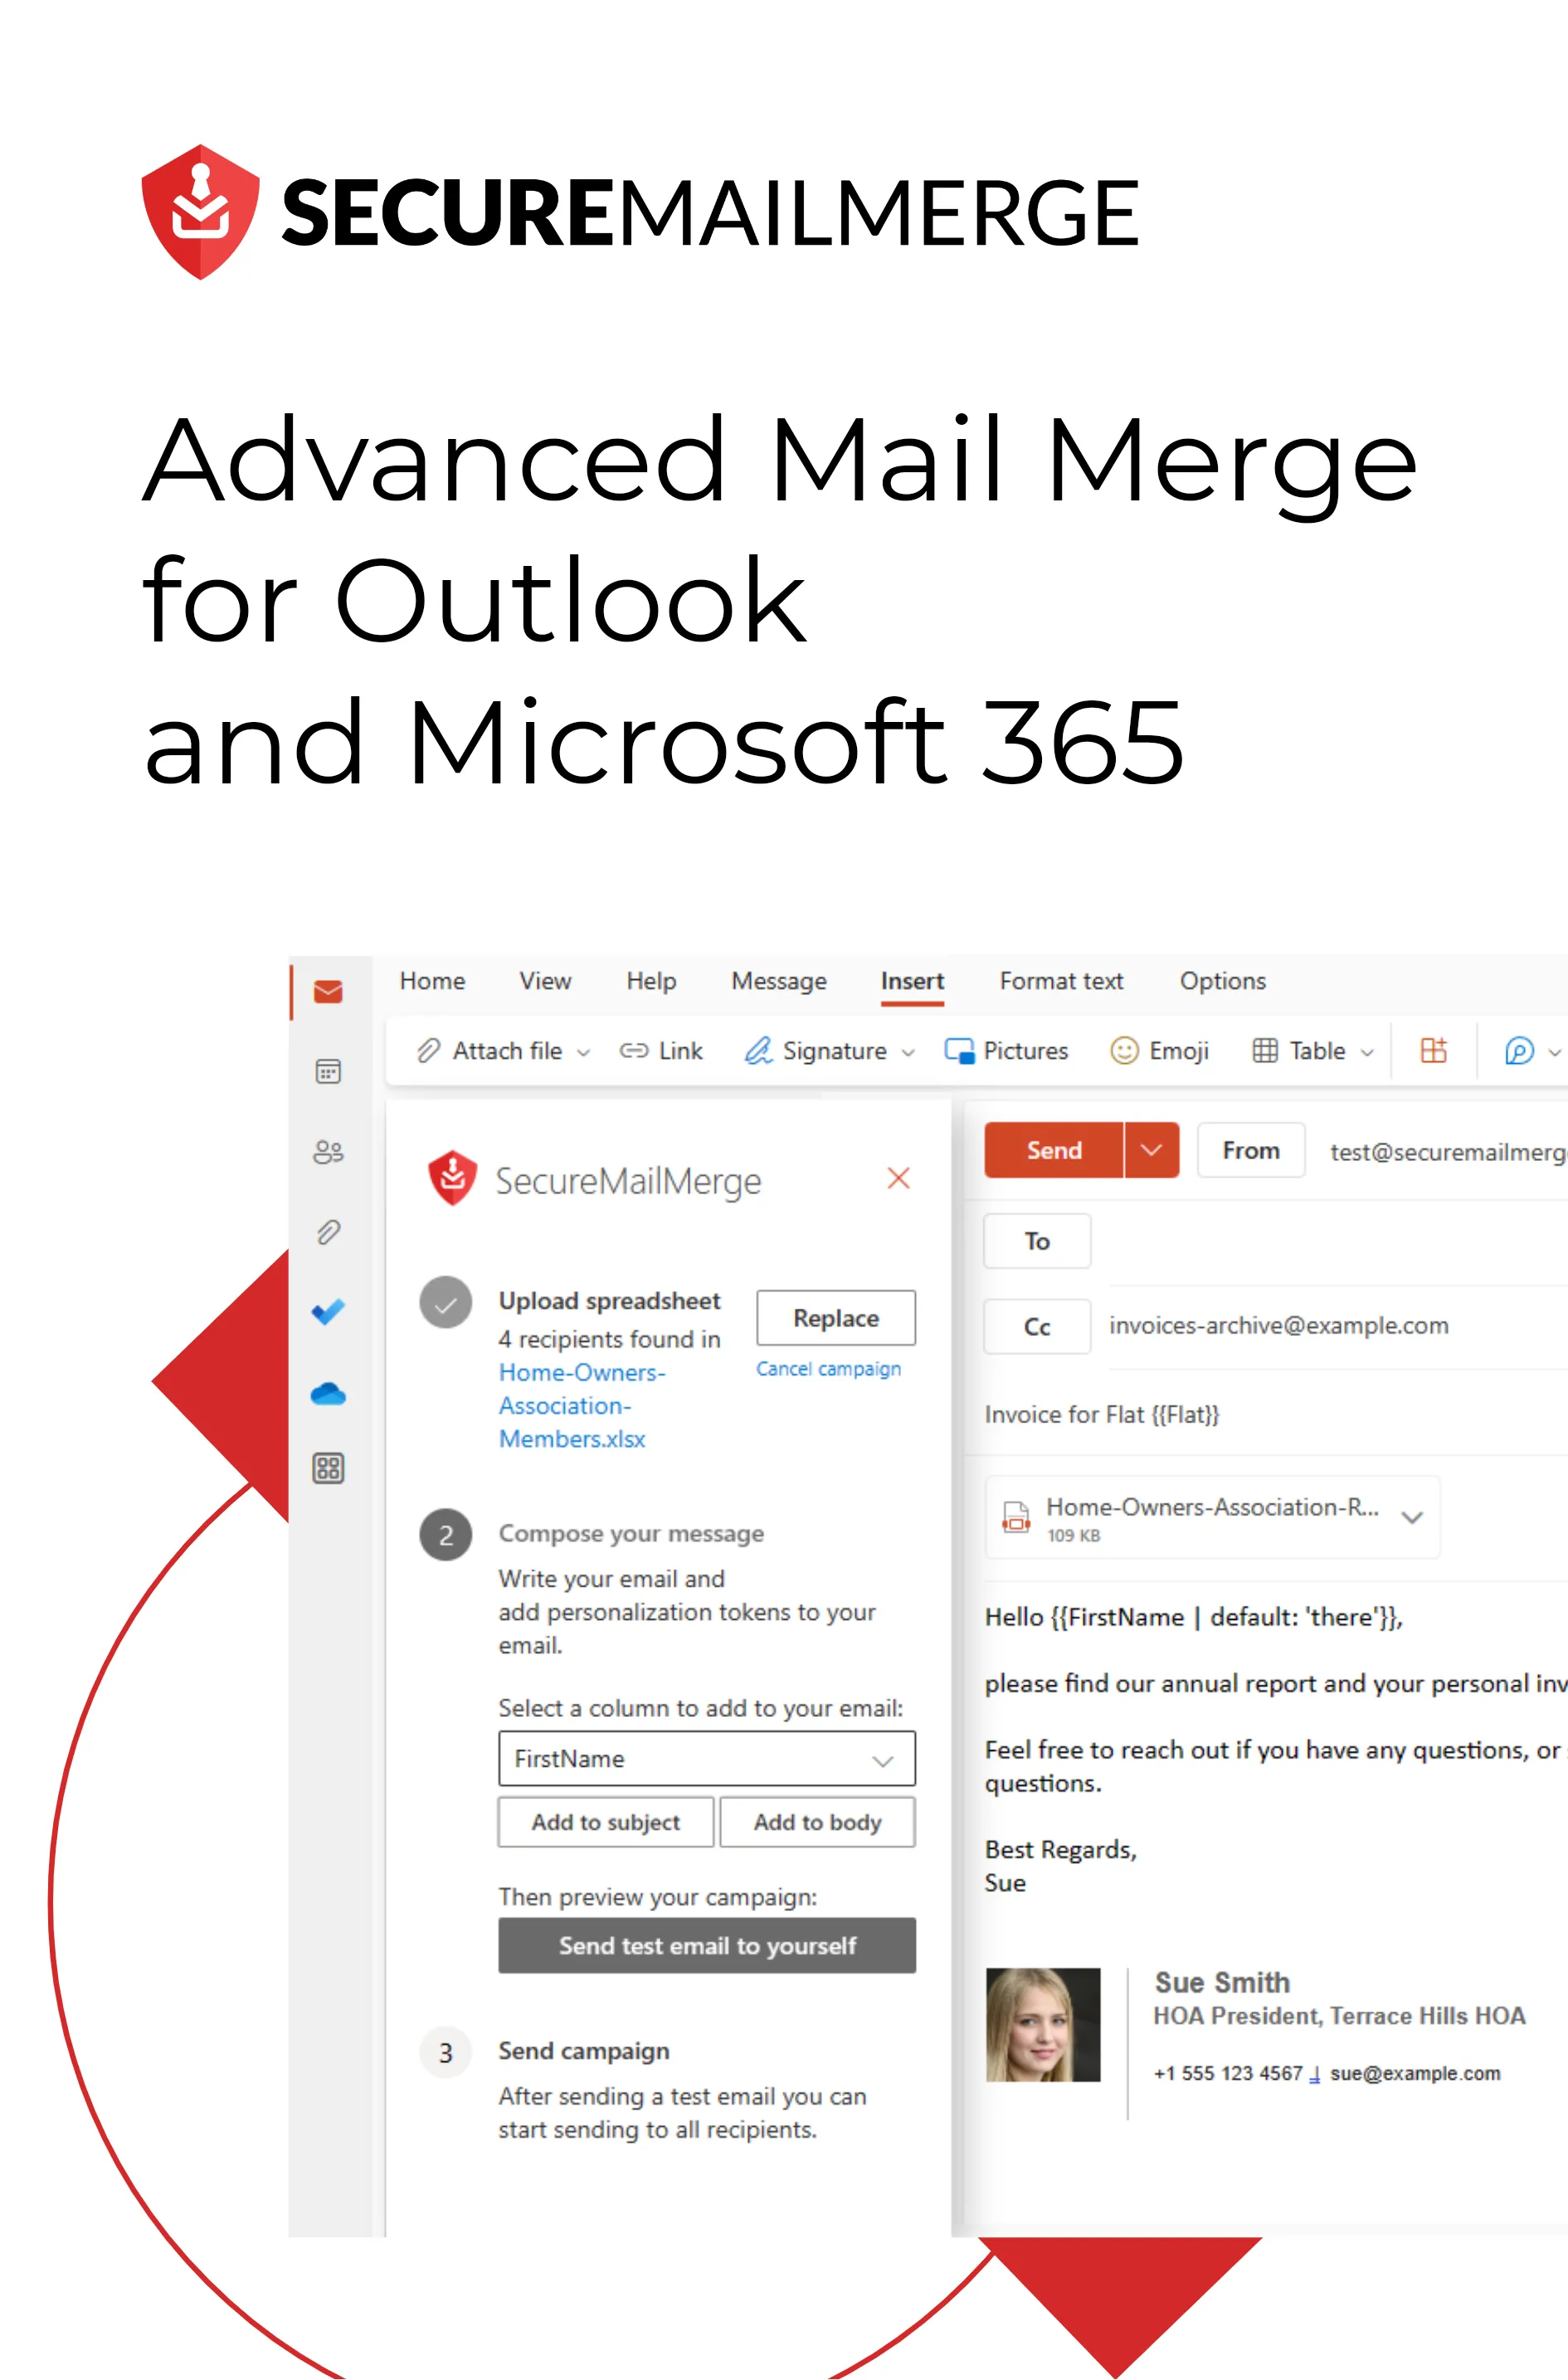
Wir werden ein kostenloses Plugin namens SecureMailMerge verwenden, das Mail Merge in Outlook hinzufügt. Du kannst es über das Apps-Symbol in deinem Menüband hinzufügen. Es funktioniert für Outlook auf Windows und Mac, aber auch wenn du nur die Webversion verwendest.
Schritt 3. Starte das Plugin
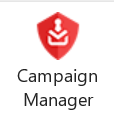
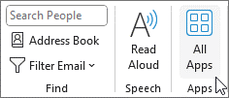
Als Nächstes erstelle eine neue leere E-Mail. Du solltest jetzt das rote “Campaign Manager”-Symbol in deinem Menüband sehen. Manchmal befindet sich das Symbol in einem Menü namens “Apps” oder hinter einem Dropdown-Menü, je nachdem, wie dein Outlook konfiguriert ist.
Es gibt einen detaillierteren Leitfaden, der dir Screenshots zeigt, wo das Symbol sein könnte, falls es nicht sofort offensichtlich ist.
Klicke auf das Symbol, um das Plugin zu starten.
Schritt 4. Lade die Tabelle hoch
Klicke dann in der Sidebar, die erscheint, auf “Tabelle verwenden”. Wähle die Datei aus, die du oben erstellt hast, um sie in SecureMailMerge zu laden.
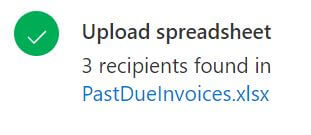
Als Nächstes wird dir der Name der Tabelle angezeigt, die du ausgewählt hast, und wie viele Zeilen gefunden wurden. Weiter unten siehst du auch ein Dropdown mit allen erkannten Spalten.
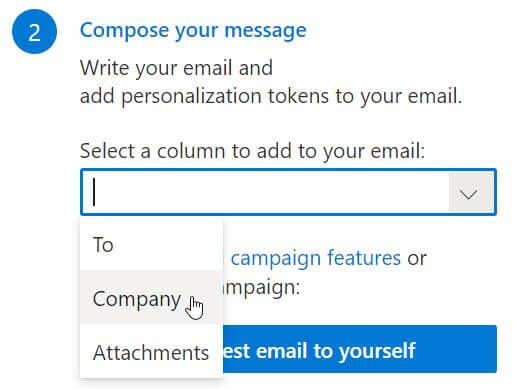
Schritt 5. Schreibe eine personalisierte E-Mail
Ich empfehle, die gesamte E-Mail zuerst zu schreiben und dann, wenn du zufrieden bist, zurückzugehen und Teile der E-Mail mit Personalisierungstokens zu ersetzen.

Setze den Cursor an die Stelle, an der du ein Token hinzufügen möchtest (oder markiere einen Textabschnitt, den du ersetzen möchtest). Wähle die Spalte aus dem Dropdown-Menü und entscheide dann, ob du es in den Betreff oder den Text der E-Mail einfügen möchtest.
Pro-Tipp
Ein Personalisierungstoken ist einfach der Spaltenname, der in zwei geschweifte Klammern gesetzt ist. Beispiel: {{FirstName}}
Wenn du also deinen Prozess beschleunigen möchtest, kannst du es einfach in die E-Mail eintippen und sie werden ersetzt, als hättest du sie über das Dropdown-Menü hinzugefügt.
Schritt 6. Test senden
Um sicherzustellen, dass die Ersetzungen wie erwartet funktionieren, klicke auf “Test-E-Mail senden”, und es wird eine E-Mail an deine eigene E-Mail-Adresse gesendet, wobei die Personalisierungs-Token durch die Werte aus der ersten Zeile der Tabelle ersetzt werden.
Letzte Schritte. Schick es an alle
Wenn du zufrieden bist, klicke auf “Kampagne senden” und individuelle E-Mails werden an alle in deiner Tabelle gesendet.
Nun, war das nicht viel einfacher als der traditionelle Serienbrief?
Bonus Schritt: Hol dir Hilfe beim Schreiben der E-Mail
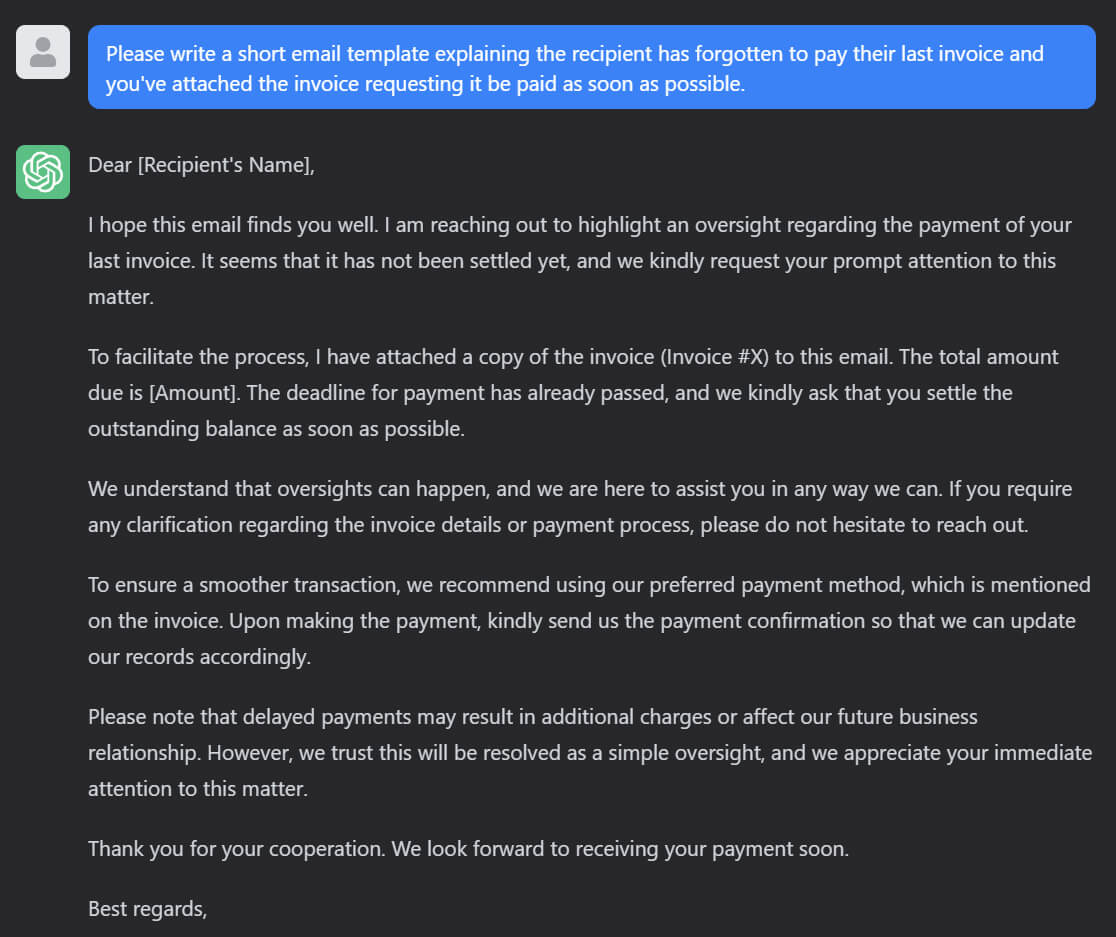
Wenn du wie ich bist und ein leeres E-Mail-Fenster dir Schreibblockaden verursacht, wie wäre es, wenn du zu dem kostenlosen ChatGPT gehst und es so etwas fragst:
“Bitte schreibe eine kurze E-Mail-Vorlage, in der erklärt wird, dass der Empfänger vergessen hat, seine letzte Rechnung zu bezahlen, und dass ich die Rechnung angehängt habe, mit der Bitte, sie so schnell wie möglich zu begleichen.”
Die Chancen stehen gut, dass es dir leichter fällt, diese E-Mail zu schreiben, sobald du ein Beispiel wie dieses hast, das dir Inspiration gibt.
Hat dir dieser Artikel gefallen?
Wir haben eine ganze Bibliothek mit nützlichen Artikeln für dich zum Lesen.
Zeig mir die Bibliothek der Outlook-Artikel.